WhatsApp: +86 18126157548 Email: kerry@alpinemold.com

Views: 0 Author: Site Editor Publish Time: 2026-11-03 Origin: Site


During injection molding production, you may have encountered this situation: the part is successfully ejected from the mold and meets all dimensional requirements, yet several noticeable black spots appear on its surface. For products with high appearance standards, even these minor defects can cause an entire batch to fail quality inspection.
So, what causes black spots in injection molding, and how do they develop? In this article, we'll start by examining the characteristics of black spot defects, then explore their common causes, troubleshooting methods, and preventive measures to help you identify and resolve injection molding black spots more effectively.
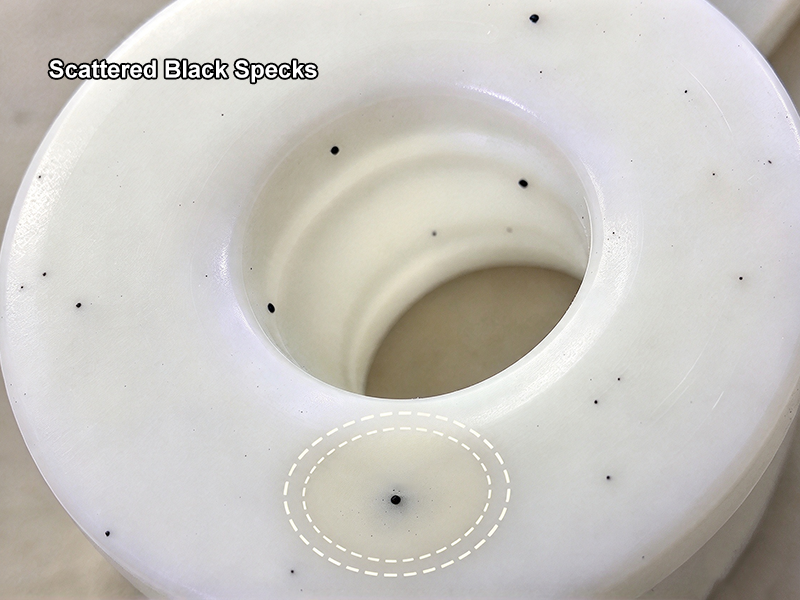
Black spots in injection molding refer to black or dark brown spots or particle-like defects that appear on the surface or inside plastic parts after injection molding. These defects may appear as isolated black dots, irregular dark patches, or tiny black specks scattered across the product surface.
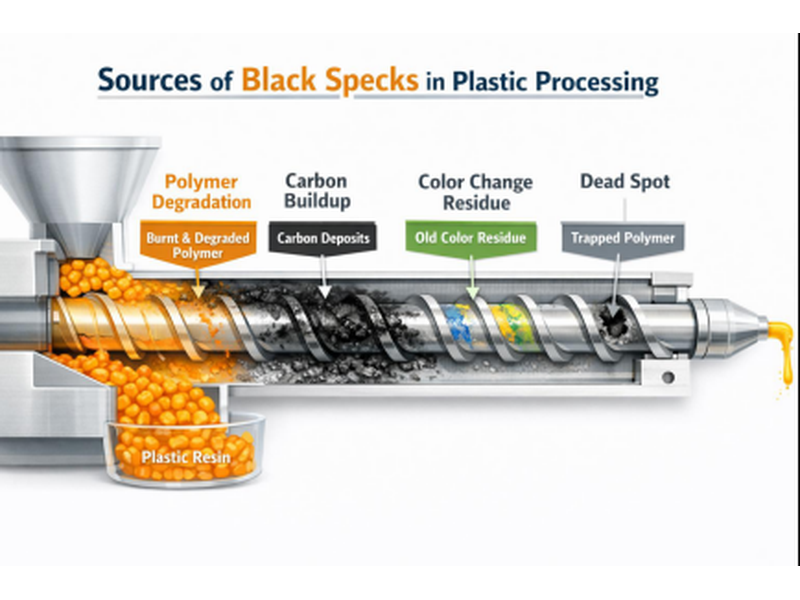
Although black spots may seem like minor surface defects, their actual causes can involve multiple stages of the process, including raw material contamination, thermal degradation of plastic, residual deposits inside the injection molding machine, and carbonized buildup in the mold runner system.
If you fail to identify the root cause, repeatedly adjusting injection pressure, temperature, or cooling time may not solve the problem and may even affect molding stability.
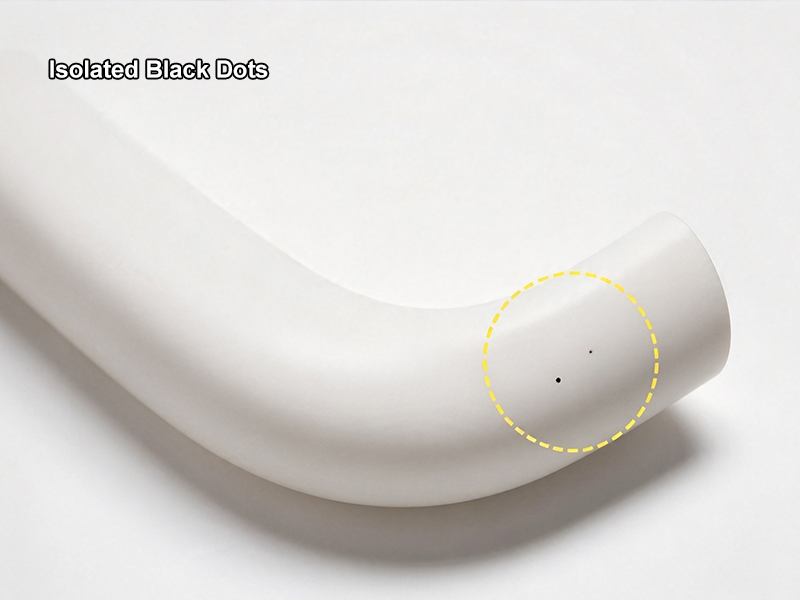
When plastic remains in the barrel for too long or the actual melt temperature exceeds the material's recommended processing range, thermal degradation may occur. This can produce dark or even carbonized residues. When these residues mix with the subsequent melt, they may form black spots on injection molded parts.
In addition to excessive temperature, failing to clean the barrel after machine shutdowns, extended production delays, and a mismatch between the injection cycle and the machine's plasticizing capacity can also increase material residence time. Since different plastics have different levels of thermal stability, you need to set the temperature and processing parameters according to the specific resin's requirements rather than directly applying processing conditions used for other materials.
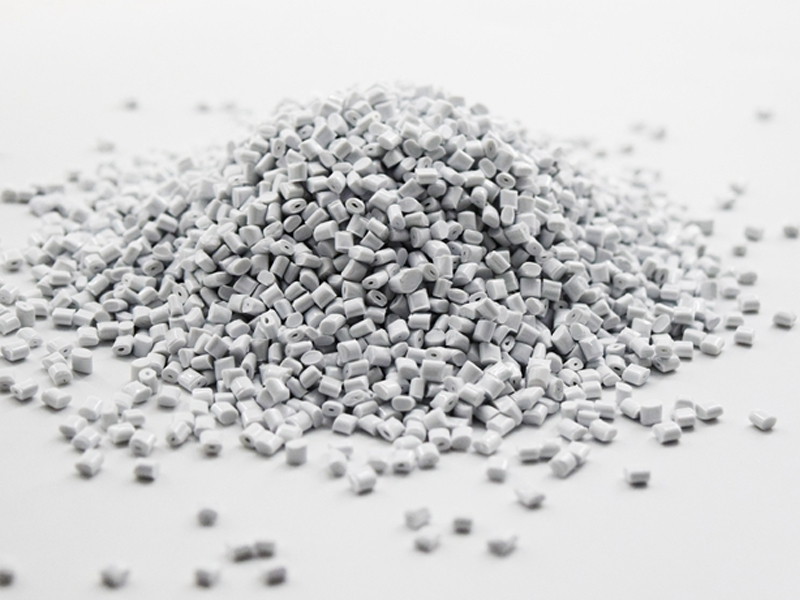
If plastic pellets, masterbatch, or regrind become contaminated during storage, transportation, or mixing, foreign particles may enter the injection molding machine with the material and eventually cause black spots on the molded parts.
For example, damaged raw material packaging, residual plastic of another color in the feeding system, or different materials mixed into regrind can all introduce contamination. Sometimes, even when the raw material itself is clean, residues inside the mixer, hopper, or drying equipment can cause similar defects.
Therefore, if black spots suddenly appear after you change the raw material batch, you should first check the new material batch, masterbatch, and feeding system, as well as verify the source and management of regrind.
Residual material buildup in the barrel, screw, nozzle, and hot runner system is another common source of black spots. Some plastics may gradually degrade at high temperatures and adhere to dead spots inside the machine, screw surfaces, or runner areas. When these deposits are dislodged by flowing molten plastic, they can enter the molded parts.
If you notice black spots only after a period of continuous production, or the defects increase significantly after changing materials or colors, you should pay close attention to residual material inside the injection unit. For hot runner molds, you should also inspect runner corners, nozzle connections, and other areas where material may become trapped.
Keep in mind that simply increasing the number of purging cycles may not completely solve the problem. If residues have firmly adhered to internal surfaces or certain structural areas are prone to material buildup, targeted cleaning and inspection may be necessary.
Plastic is subjected to shear forces during screw rotation, conveying, and plasticizing. If the screw speed, back pressure, or other plasticizing parameters are set incorrectly, localized shear heating can increase the melt temperature and raise the risk of material degradation.
For example, when you excessively increase screw speed to shorten plasticizing time or set back pressure too high, the actual melt temperature may exceed the temperature displayed by the barrel control system. This is particularly important for materials with low thermal stability or a narrow processing window.
If black spots begin to appear after adjusting plasticizing parameters, you should reassess the screw speed, back pressure, and plasticizing time, and verify them against the processing range recommended by the material supplier. Don't focus only on the barrel temperature settings, as heat generated by localized shear can also affect the condition of the melt.
The mold itself can also be a source of black spots or black burn marks. If plastic residues, oil, or other contaminants accumulate in the cavity, gate, runner, or venting channels, these substances may transfer to the surface of your molded parts during production.
In addition, poor mold venting can prevent air and gas inside the cavity from escaping properly. When molten plastic fills the cavity rapidly and compresses the trapped gas, the local temperature can rise sharply, resulting in burn marks. This phenomenon is commonly known as the diesel effectdieseling.
You can make an initial assessment by observing the defect location. If black marks repeatedly appear near the end of filling, deep ribs, or cavity venting areas, you should focus on checking whether the vents are blocked and whether the filling speed is appropriate. If black spots appear randomly, you also need to investigate possible material and machine contamination.
It's important to distinguish between black spots caused by carbonized material and burn marks caused by trapped gas. Although they may look similar, their formation mechanisms are different. Before taking corrective action, you need to confirm the cause by examining the defect location, mold condition, and molding process.
When black spots appear on your injection molded parts, simply adjusting the temperature or increasing cleaning frequency may not solve the problem. You first need to determine whether the black spots come from the raw material, injection molding equipment, or mold itself before taking corrective action. By observing defect distribution, checking material and equipment conditions, and analyzing production parameters, you can narrow down the possible causes and reduce unnecessary downtime and mold trials.
First, observe the location, quantity, and distribution pattern of the black spots. This information can help you identify the possible source of the problem.
If black spots appear randomly across different areas of the part, you should first check the raw material, feeding system, and possible contamination inside the injection molding machine. If they are concentrated near the gate, inspect the nozzle, gate, and hot runner for material buildup. If black marks repeatedly appear near the end of filling, deep ribs, or cavity venting areas, you should also consider localized burning caused by poor venting.
You should also record when the black spots first appear. For example, do they occur during machine startup, after a period of continuous production, or after changing the material or color? Comparing this information with your production records can help you narrow down the troubleshooting direction more quickly.
When black spots appear on your molded parts, you can start by checking whether the raw materials, masterbatch, and regrind have been contaminated. Different plastics have different processing temperature ranges and levels of thermal stability. If a material remains under unsuitable processing conditions for too long, it may degrade and form dark-colored residues.
The following plastic materials are worth paying particular attention to:
PlasticMaterial | PotentialRisk | What You Should Check |
ABS | Excessive heat or prolonged residence time may cause material degradation and discoloration. | Check the barrel temperature, residence time, and material residues. |
PC | Excessive processing temperatures or improper material handling may cause degradation. | Check the melt temperature, raw material drying, and residence time. |
PA6 / PA66 | Improper moisture control may affect part quality, while overheating may cause degradation. | Check drying conditions, moisture content, and processing temperature. |
PBT | Improper moisture and processing temperature control may cause material degradation. | Check raw material drying, melt temperature, and material residence time. |
POM | Sensitive to overheating and unsuitable processing conditions, which may cause thermal degradation. | Check barrel temperature, residence time, and material residues inside the machine. |
PP | Prolonged exposure to high temperatures may cause material degradation. | Check temperature settings, shutdown time, and equipment cleanliness. |
PC/ABS | Improper temperature control or foreign material contamination may cause discoloration and black spots. | Check material batches, temperature settings, and mixing equipment. |
It's important to note that the materials listed above have potential degradation risks. This does not mean black spots will easily occur during normal processing. The actual risk depends on the specific resin grade, additives, regrind ratio, and processing conditions.
In addition to checking the resin itself, you should also pay attention to the masterbatch, regrind, raw material bags, dryers, and feeding lines. If you use regrind, make sure its source is clear, its material type is consistent, and it has not been mixed with other colors or plastic grades.
If black spots appear immediately after changing the raw material batch or color, you can first check the new material batch and inspect the feeding system for residues from previous production. If necessary, use a confirmed clean batch of raw material for a comparison trial. Observe whether the black spots decrease to further narrow down the source of contamination.
If no obvious problems are found with the raw materials, you need to check whether there is residual material inside the injection molding machine.
The barrel, screw, and nozzle are continuously exposed to high-temperature molten plastic and may accumulate degraded plastic or other material residues. When these deposits break loose and mix with the subsequent melt, they can cause black spots in injection molding. For molds equipped with a hot runner system, you should also inspect the hot runner nozzles, runner connections, and areas where plastic may become trapped.
You can observe whether black spots gradually increase after a period of continuous production or become more noticeable after changing materials or colors. If necessary, carry out purging, cleaning, or internal inspections according to the recommendations of the machine and material suppliers. Any disassembly of the screw, nozzle, or hot runner components should be performed by experienced technicians.
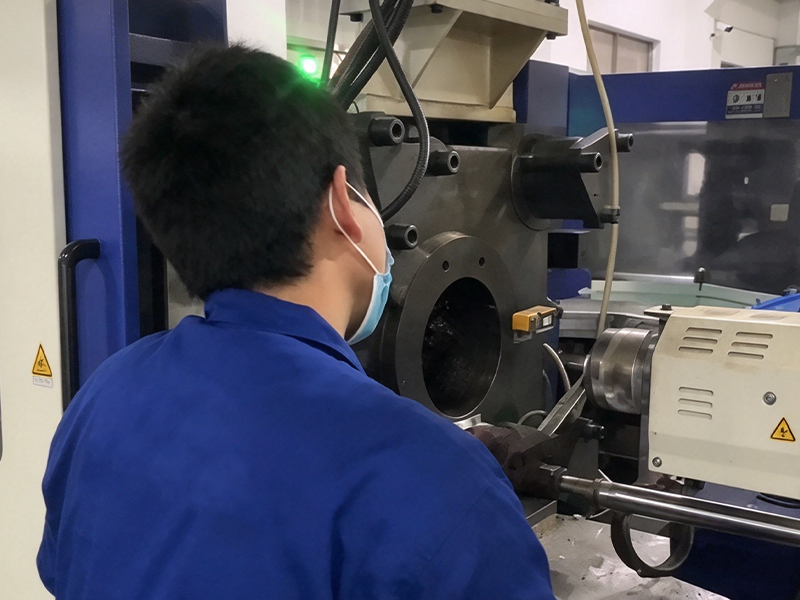
Mold inspection mainly focuses on two areas: first, whether oil, residual plastic, or carbonized deposits have accumulated in the cavity, gate, or runner; second, whether the vents are blocked and whether gas inside the cavity can escape properly.
If black spots or burn marks repeatedly appear in the same location, you should focus on inspecting the material flow path and venting structure in that area. For example, if defects repeatedly occur near the end of filling, check whether the vents are blocked by residues. If black spots are concentrated near the gate, further inspect the gate and upstream runner for material buildup.
After cleaning the mold, you can conduct a mold trial to see whether the defects disappear. If the problem persists, continue checking the filling speed, material condition, and possible contamination inside the machine rather than immediately assuming that the mold itself is the cause.
Finally, you need to review the actual production parameters when the black spots appeared, including barrel temperature, melt temperature, screw speed, back pressure, plasticizing time, and material residence time.
If you have recently adjusted the processing parameters or the machine has been shut down for an extended period before restarting, you should pay close attention to whether these changes have increased the risk of material degradation. For hot runner molds, you should also check whether the setpoints and actual temperatures of each temperature control zone are normal.
It is recommended that you adjust only one key parameter at a time and record the part quality before and after each adjustment. This helps you determine more clearly whether parameter changes are related to the black spots and prevents multiple simultaneous adjustments from making the problem difficult to trace.
Keep in mind that not all black spots can be eliminated by adjusting process parameters. If the root cause is raw material contamination or carbonized deposits inside the equipment, you still need to address material management or equipment cleaning.
By following these steps, you can gradually narrow down the possible sources of black spots. Observing defect patterns first, then inspecting materials, equipment, and the mold before verifying process parameters, is more effective than blindly adjusting production conditions. It also helps reduce the risk of similar defects recurring.
When black spots appear on your injection molded parts, you need to apply corrective measures based on the actual source of the defects. If the problem is caused by material contamination, simply adjusting the injection temperature may not help. If carbonized residues inside the machine are responsible, black spots may continue to appear even when the process parameters are normal.
Therefore, after identifying the root cause, you can gradually improve the process by addressing melt temperature, equipment cleaning, raw material management, mold maintenance, and plasticizing parameters.
If black spots are related to thermal degradation of plastic, you should first check the melt temperature and the material's residence time inside the barrel.
When the processing temperature is too high or plastic remains in the heated barrel for too long, material degradation may occur, producing dark-colored residues. You can refer to the processing temperature range provided by the material supplier and check the setpoints and actual temperatures of each heating zone to identify possible local overheating or temperature control issues.
At the same time, you need to pay attention to machine shutdowns, production delays, and extended cycle times. If the machine is stopped for a long period, handle the residual material in the barrel according to the resin characteristics and equipment operating procedures to prevent the plastic from remaining at high temperatures for too long.
When adjusting the temperature, it is recommended that you change the parameters gradually and observe whether the black spots decrease. Do not lower the temperature blindly to eliminate black spots, as this may lead to insufficient plasticizing, reduced melt flowability, or other molding defects.
If black spots are caused by carbonized plastic or residual material accumulated inside the injection molding machine, you need to clean the affected components accordingly.
First, you can purge the machine or perform a cleaning cycle according to the recommendations of the equipment and material suppliers. Observe whether obvious black particles appear in the purged plastic. If black spots continue to occur, further inspect the barrel, screw, and nozzle for deposits that are difficult to remove.
When switching between different materials, you should select a purging compound that is compatible with the current resin and equipment conditions, and use it according to the recommended procedure. For stubborn residues that have adhered to internal surfaces, repeated purging alone may not remove them completely. In such cases, professional technicians may need to inspect and clean the affected components.
After cleaning, you can restart trial production and inspect parts over multiple consecutive molding cycles to confirm whether the black spots have disappeared. When disassembling or cleaning high-temperature components, you must follow the equipment manufacturer's safety procedures.
If black spots are caused by contamination in raw materials, masterbatch, or regrind, you need to control the process before the materials enter the injection molding machine.
First, check the raw material packaging, storage environment, and feeding equipment to prevent dust, oil, and other foreign particles from mixing with plastic pellets. The hopper, dryer, mixer, and conveying lines should also be kept clean. This is particularly important when changing materials or colors, as you need to ensure that no plastic residues from the previous batch remain inside the equipment.
If you use regrind in production, make sure its source is traceable, its material type is consistent, and its usage ratio is controlled according to product quality requirements. Mixing different resin types or colors can introduce contamination defects that are difficult to eliminate through ordinary process adjustments.
In addition, you need to carry out the necessary drying treatment according to the resin characteristics. For example, hygroscopic materials such as PC, PA, and PBT should be dried according to the specific grade requirements for temperature, time, and moisture content. Although drying does not necessarily remove black spots directly, proper material preparation helps reduce other molding problems caused by improper material handling.
If black spots are concentrated in specific areas or dark patches appear together with burn marks, you need to focus on inspecting the mold cavity, gate, runner, and venting system.
Oil, plastic residues, and carbonized deposits inside the mold should be cleaned promptly to prevent contaminants from entering the melt or transferring to the part surface during molding. If you use a hot runner system, you should also check the nozzles and runners for trapped material or degraded plastic residues.
If defects repeatedly appear near the end of filling, deep ribs, or venting areas, you also need to check whether the vents are blocked and whether gas inside the cavity can escape properly. If necessary, you can adjust the filling speed based on mold trial results and ask a mold engineer to evaluate whether the venting structure needs improvement.
Keep in mind that although black spots and burn marks may look similar, their corrective measures are not exactly the same. If the defect is caused by material contamination, simply improving mold venting may not solve the problem. Therefore, you should first identify the defect type before deciding whether to clean the mold, improve venting, or adjust the molding conditions.
Black spots in injection molding can be caused by various factors, including raw material contamination, thermal degradation of plastic, equipment residues, and mold contamination.To solve this problem effectively, you need to identify the source based on the defect appearance, material properties, and actual processing conditions, then take appropriate corrective measures. By controlling processing temperature and material residence time, keeping equipment and molds clean, and improving raw material management, you can reduce black spot defects, minimize production losses, and improve product quality consistency.
In injection molding, stable product quality depends not only on process parameters but also on mold design, manufacturing precision, and production control. Alpine Mold specializes in custom injection mold manufacturing and injection molding production, providing services from mold design and manufacturing to injection molding. With an experienced engineering team, comprehensive quality control procedures, and ISO 9001:2015 and IATF 16949:2016 certifications, we are committed to helping customers improve product quality and production stability. If you are developing new plastic parts or looking to improve an existing injection molding project, feel free to contact Alpine Mold to discuss your requirements.
Black spots do not necessarily mean that the mechanical properties of a product have deteriorated. If they are caused by foreign contaminants, the impact may be mainly cosmetic. However, if they result from plastic degradation, you need to further evaluate whether the material properties have been affected. For load-bearing, sealing, or safety-related parts, you should conduct the necessary performance tests according to product requirements rather than judging quality by appearance alone.
If black spots appear in parts from only one cavity of a multi-cavity mold, you should first inspect the corresponding gate, runner branch, hot runner nozzle, and local venting area. Different cavities may have different flow paths and temperature conditions. Therefore, recording defects cavity by cavity and comparing the molded parts can help narrow down the possible causes.
Yes, provided that the source, material type, cleanliness, and usage ratio of the regrind are properly controlled. You need to ensure that it is not contaminated with different plastics, dust, or other foreign materials, and follow the requirements of the material supplier and product quality standards. If black spots increase significantly after using regrind, you can conduct comparison trials to determine whether it is related to the defects rather than assuming that all regrind causes black spots.
For tiny black spots that are difficult to identify with the naked eye, you can use a magnifying glass, optical microscope, or machine vision system depending on the product transparency, surface texture, and inspection requirements. For mass inspection, machine vision can also help identify defect locations and record their frequency. However, before introducing automated inspection, you should establish consistent lighting, camera angles, inspection resolution, and acceptance criteria.
Black spots appearing after a mold or material changeover may be caused by residual plastic from the previous production batch, color contamination, or material buildup inside the machine. You should also check whether the new material is compatible with the existing processing conditions and whether the runner connections and temperature settings are normal after the mold change. It is recommended that you keep samples and production records from before and after the changeover to identify when the defects first appeared and what changes may have caused them.


