WhatsApp: +86 18126157548 Email: kerry@alpinemold.com

Views: 0 Author: Site Editor Publish Time: 2026-10-21 Origin: Site


If you experience difficulty ejecting parts during injection molding, find that parts stick tightly to the mold core, or notice that molded parts fail to release properly when the mold opens, you may be dealing with Sticking Issues in Injection Molding. These injection molding sticking problems can affect part appearance and dimensional accuracy, extend production cycle times, damage the mold, and reduce overall production efficiency.
In this guide, you'll learn about the most common causes of mold sticking in injection molding, how to prevent it before production begins, and how to troubleshoot and resolve sticking problems on the production floor. First, let's look at what sticking issues in injection molding actually mean.
Sticking issues in injection molding occur when plastic parts cannot be released smoothly from the mold cavity or core after the mold opens, leaving the parts stuck inside and difficult to remove.
Under normal conditions, once the injection molding cycle is complete and the mold opens, the ejection system pushes the molded parts out smoothly. However, excessive friction between the parts and the mold surface, or problems with product design, mold structure, material selection, or molding parameters, can prevent proper demolding. As a result, manual intervention or process adjustments may be required to remove the parts.
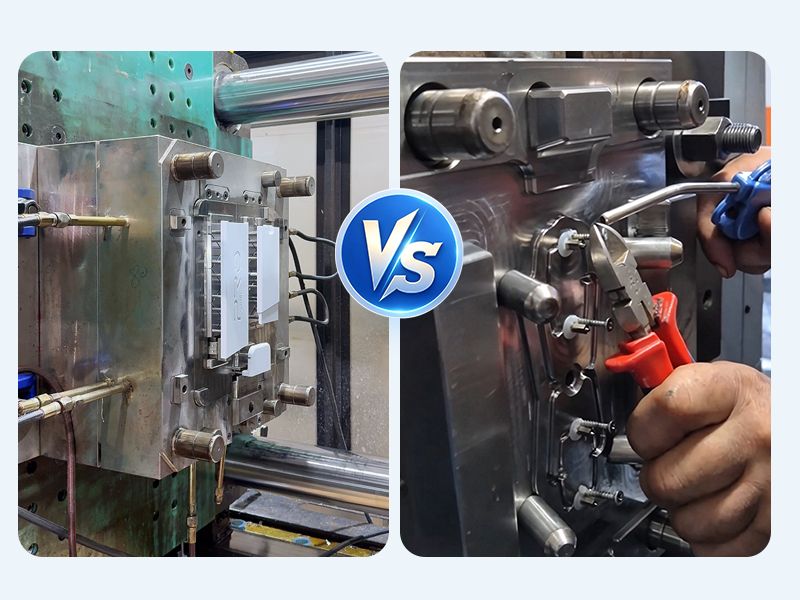
An insufficient draft angle occurs when the sidewalls of a plastic part do not have enough taper to allow the part to release smoothly from the mold in the opening direction. This can increase demolding resistance, cause surface scratches, and even lead to part deformation or damage.
In injection molding, the required draft angle depends on the sidewall depth, material properties, and surface texture. The following values are common design references:
Part surface type | Typical draft angle |
Smooth surfaces | 1°–2° |
Vertical surfaces with limited draft space | 0.5° as an initial reference, subject to demolding evaluation |
Lightly textured surfaces | Approximately 3° |
Medium to heavily textured surfaces | 5° or more |
Why Does an Insufficient Draft Angle Cause Sticking?
As plastic cools, it shrinks. If the part has insufficient draft, it is more likely to rub against the mold core during ejection. For textured parts, the small peaks and valleys on the mold surface can further increase demolding resistance, making the part more prone to scuffing, whitening, or sticking to the mold.
How to Fix an Insufficient Draft Angle
During product design and mold design reviews, focus on the following measures:
Increase the draft angle: For smooth sidewalls, start with a reference range of 1°–2°. For textured surfaces, increase the angle as needed based on the texture depth and type.
Consider sidewall depth: Deeper sidewalls generally require more draft. As an initial rule of thumb, consider adding approximately 1° of draft for every 25 mm of sidewall depth, then adjust based on the actual part geometry.
Review texture and surface requirements: If the part requires a deep texture but the design cannot accommodate a larger draft angle, reassess the texture specification, part geometry, or demolding design.
Check draft during DFM: Before mold manufacturing, review the draft angles, mold opening direction, and ejection strategy to identify areas that may cause sticking.
If appearance or assembly requirements prevent you from increasing the draft angle, work with your mold engineer to evaluate alternative solutions before tooling begins, rather than waiting until mold trials to address demolding problems.
The machining marks and polishing direction on a mold surface can affect how easily plastic parts release from the mold. If the mold surface contains scratches, grooves, or machining marks that interfere with the demolding direction, the parts may encounter additional resistance during ejection, leading to mold release problems, surface scratches, or drag marks.
For parts with high surface finish requirements, mold polishing involves more than controlling surface roughness. The relationship between the polishing direction and the part's demolding direction must also be considered. Even if the mold surface appears smooth, an unsuitable polishing direction or noticeable transverse scratches can still contribute to injection molding sticking problems.
How to Fix Incorrect Mold Polishing Direction
Align the polishing direction with the demolding direction: When polishing mold core surfaces, avoid creating transverse grooves or deep scratches that could obstruct the part from moving along the demolding direction.
Inspect deep cavities and narrow grooves: These areas are more difficult to polish uniformly. Pay particular attention to sidewalls, corners, and the bottoms of deep grooves, where machining marks or localized roughness may remain.
Choose the finishing process based on surface requirements: High-gloss parts require tighter control of the mold surface finish. For textured parts, evaluate the texture direction and draft angle together to ensure proper release.
Inspect part surfaces after mold trials: If parts consistently show scuff marks or drag marks in a specific direction, inspect the mold surface marks, local roughness, and demolding direction rather than simply increasing the ejection force.
Keep in mind that a shinier mold surface is not always better. The appropriate surface treatment should be selected based on the plastic material, appearance requirements, and demolding conditions. Proper cavity polishing helps reduce unnecessary friction and prevent sticking issues in injection molding when the surface finish is a contributing factor.
During injection molding, air inside the mold cavity must escape through the parting line, venting grooves, ejector pin clearances, or other specially designed venting channels. If venting is inadequate around shut-off areas or at the end of the melt flow, air can become trapped inside the cavity, interfering with melt filling and, in certain cases, increasing the resistance between the plastic part and the mold during ejection.
When trapped air is compressed rapidly, it can also generate localized heat, causing burn marks, surface defects, or material degradation. If these issues occur in deep cavities, narrow grooves, or localized shut-off areas, they can affect both part quality and demolding stability.
How to Fix Insufficient Mold Venting
Identify areas prone to trapped air: Pay particular attention to the end of the melt flow, locations where multiple flow fronts meet, deep cavities, and areas around blind holes. Evaluate venting requirements based on the gate location and the actual filling path.
Design appropriate venting grooves: Design venting grooves according to the plastic material's flow characteristics and the mold structure. Vent depth must balance effective air evacuation with the risk of flash. A single fixed dimension should not be applied to every mold.
Use existing mold features to improve venting: Where appropriate, air can escape through ejector pin clearances, insert mating surfaces, or specially designed venting inserts. Ensure that these features do not cause flash or compromise part appearance.
Verify venting during mold trials: If burn marks, short shots, or recurring demolding problems appear in the same locations, inspect the filling conditions, vent locations, and mold surface condition. Adjust the venting design if necessary.
Keep in mind that insufficient venting does not always directly cause mold sticking. It should be investigated as a potential cause of sticking issues in injection molding when trapped air, localized vacuum effects, or related molding defects interfere with part release.
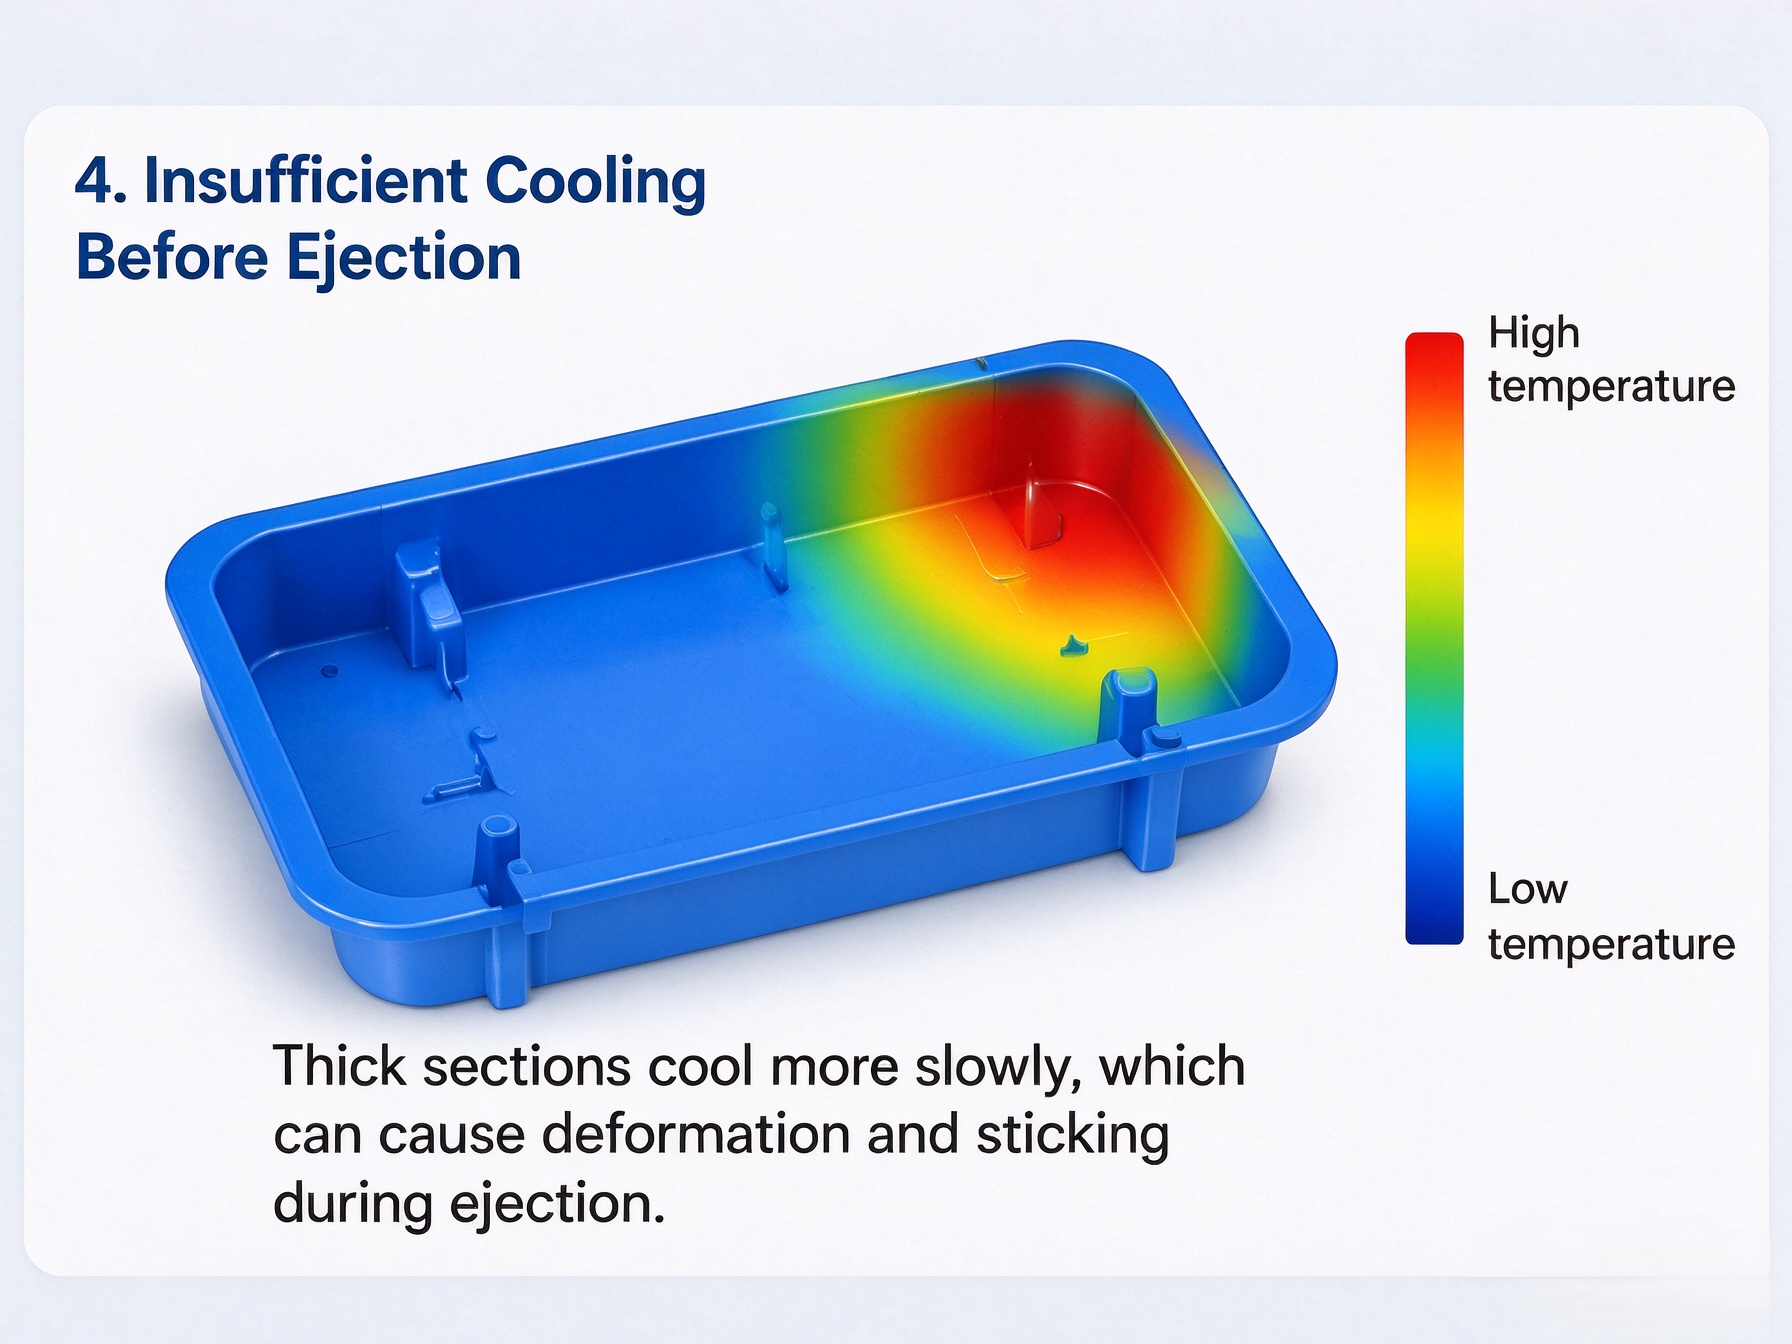
The cooling stage determines whether a plastic part has sufficient rigidity to withstand ejection. If the part has not cooled adequately, the material may remain too soft, leading to deformation, drag marks, localized dents, or ejector pin marks during ejection.
For parts with deep cavities, thick walls, ribs, or multiple bosses, cooling rates can vary significantly across different areas. Even when the outer surface has solidified, thicker sections may still retain considerable heat, leaving the part insufficiently rigid during ejection.
However, a longer cooling time is not always better. For certain materials and part geometries, cooling shrinkage can increase the part's grip on the mold core, making demolding more difficult. Therefore, part rigidity, shrinkage characteristics, and mold temperature must be considered together rather than simply extending the cooling time.
How to Fix Insufficient Cooling Before Ejection
Adjust cooling time according to wall thickness: Thick-walled sections generally require longer cooling times. During mold trials, observe part deformation, dimensional changes, and surface conditions after ejection to determine an appropriate cooling cycle.
Improve the mold cooling circuit: Check the position of cooling channels, coolant flow rate, and temperature distribution. Aim to reduce temperature differences between thick-walled sections, deep cavities, and thin-walled areas.
Inspect the part after ejection: If the part shows noticeable deformation, ejector pin marks, or localized drag marks, determine whether the cause is insufficient cooling, uneven ejection forces, or excessive shrinkage-related grip on the mold core.
Balance cooling time and demolding resistance: If extending the cooling time reduces part deformation but increases ejection resistance, further investigate material shrinkage, draft angles, core surface conditions, and the ejection system.
The appropriate cooling time should be determined based on material properties, part wall thickness, mold temperature, and mold trial results. A single fixed cooling time should not be applied to all materials and part geometries. Proper mold temperature control and cooling optimization can help reduce part deformation and prevent sticking issues in injection molding.
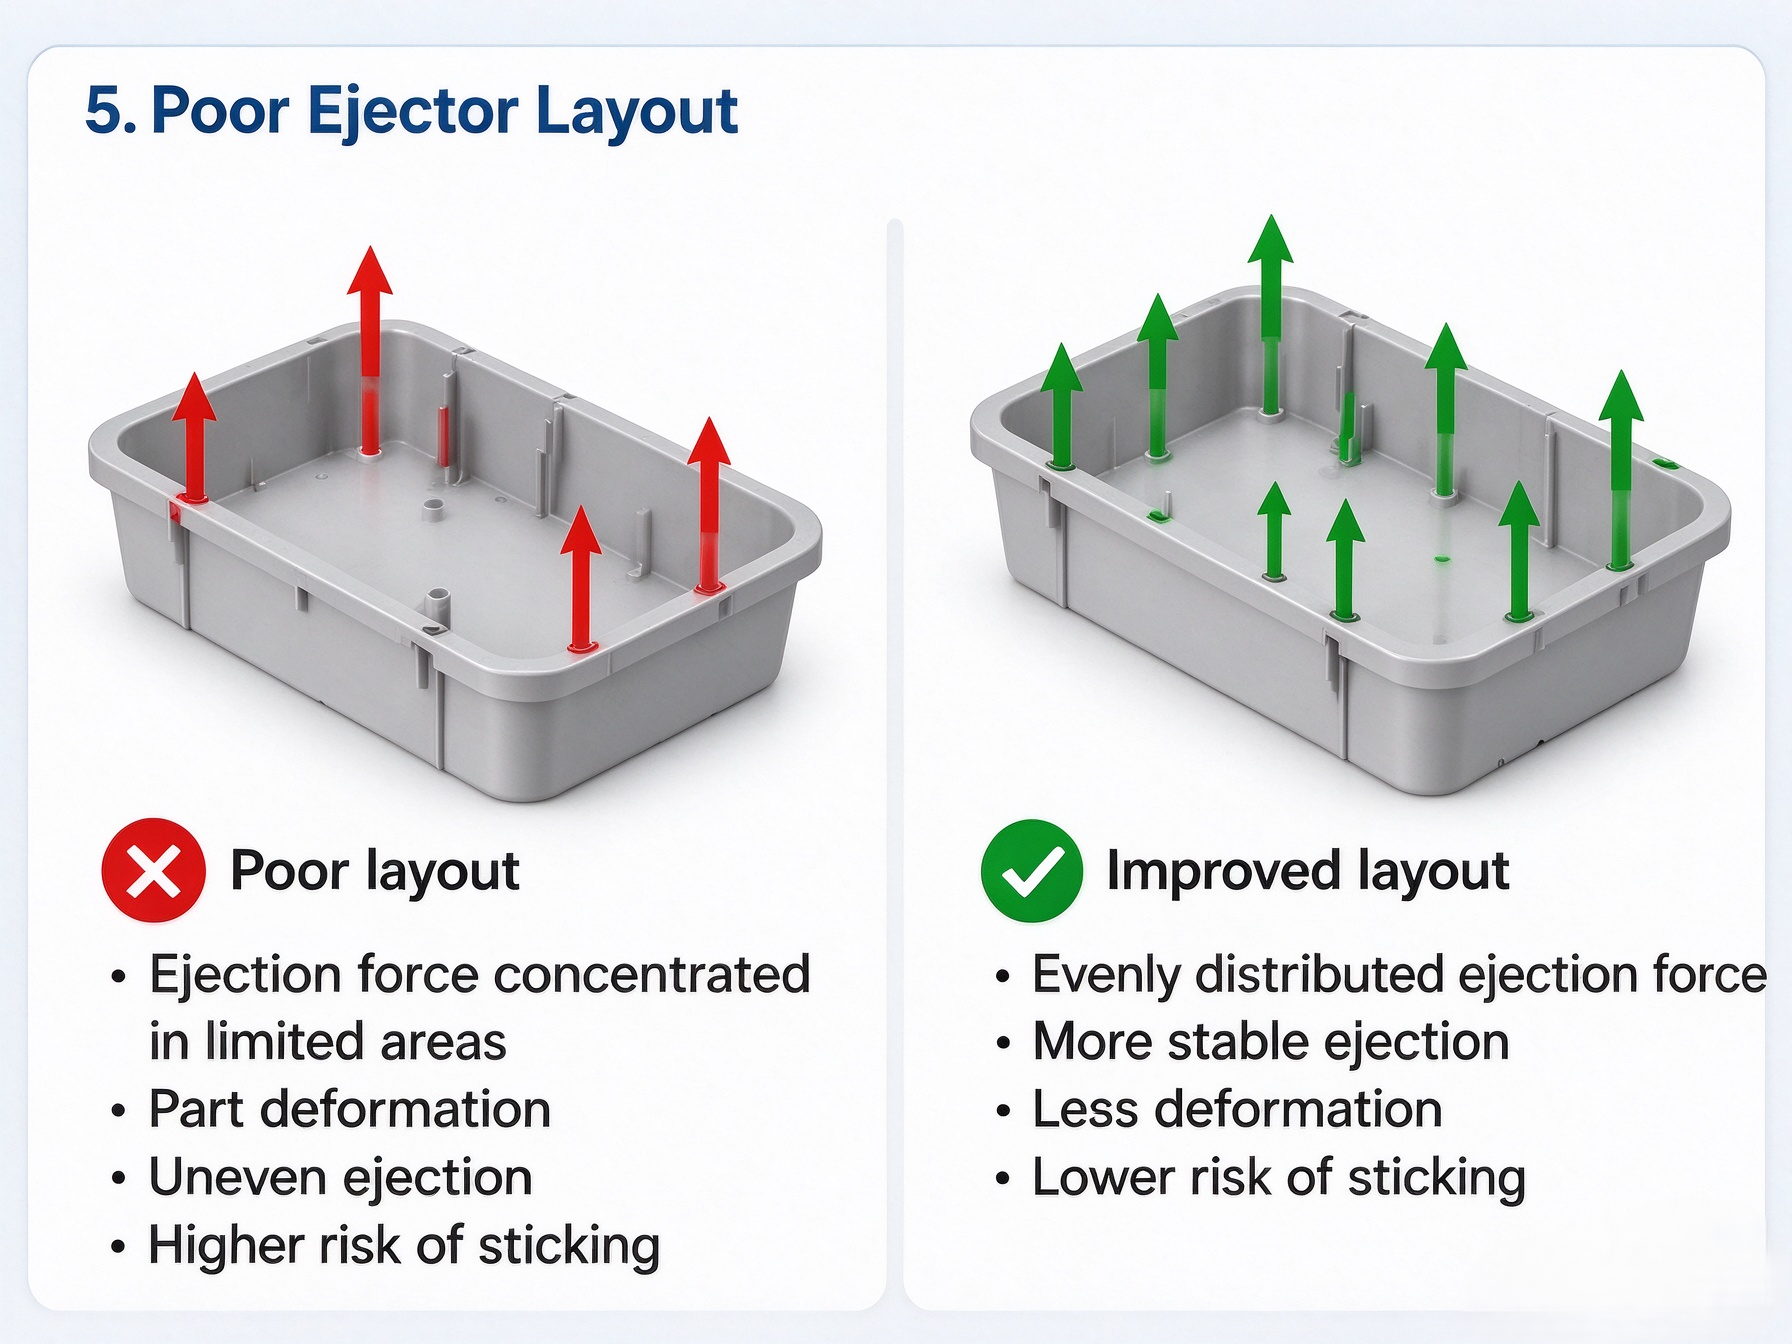
The ejection system pushes cooled plastic parts out of the mold. If the position, number, or force distribution of the ejector pins is poorly designed, ejection forces may become concentrated in a few areas. This can cause localized part deformation, uneven ejection, or situations where one side of the part releases from the mold core while the other side remains stuck.
Ejector layout is particularly important for plastic parts with deep cavities, thin walls, ribs, bosses, or irregular geometries. Even if the total ejection force is sufficient, an unsuitable ejector arrangement may prevent the part from releasing evenly from the mold.
How to Fix a Poor Ejector Layout
Position ejector pins according to the part geometry: Prioritize areas with sufficient rigidity to withstand ejection forces, such as suitable ribs, areas around bosses, or thicker sections. At the same time, avoid leaving noticeable ejector pin marks on cosmetic surfaces.
Distribute ejection forces evenly: For large or structurally complex parts, position ejector pins according to the contact between the part and the mold core. Avoid concentrating excessive ejection force in localized areas.
Inspect deep cavities and areas prone to sticking: If a part repeatedly sticks to a specific area of the mold core, evaluate whether additional local ejector pins, blade ejectors, or other suitable ejection methods are needed.
Ensure smooth and synchronized ejector movement: Check ejector pin lengths, fitting clearances, movement resistance, and ejection stroke. Prevent individual pins from sticking or moving out of sync, as this can result in uneven forces during ejection.
Consider auxiliary ejection mechanisms when necessary: For parts with deep cavities, large surface areas, or complex geometries, evaluate alternative solutions such as stripper plate ejection, sleeve ejectors, or other auxiliary demolding mechanisms.
There is no fixed number or spacing of ejector pins that works for every part. The layout should be determined based on wall thickness, material rigidity, the part's grip on the mold core, and the load-bearing capacity of the ejection areas. A proper mold design review and mold trials should be used to verify that the ejection system works reliably and helps prevent sticking issues in injection molding.
Preventing sticking issues in injection molding starts with the part design. When designing a plastic part, ensure that sufficient draft angles are provided based on the part depth, material shrinkage characteristics, and surface texture. Deeper sidewalls and deeper textures generally require larger draft angles.
If a part has deep cavities, long sidewalls, or large surfaces that wrap around the mold core, demolding risks should be evaluated early in the design process.
For cosmetic surfaces that require deep textures, do not focus on the texture appearance alone. Consider the demolding direction and draft angle together to avoid excessive resistance during part release.
The better the part geometry is designed, the easier it is to achieve stable production with the finished mold.
If a plastic part contains internal undercuts, snap-fit features, side holes, or other complex geometries, the appropriate ejection method must be determined during mold design. Depending on the part structure, mechanisms such as lifters, sliders, internal core pulls, and stripper plates can be used to release the part from the mold along the appropriate movement paths.
The position and number of ejector pins must also be carefully planned.
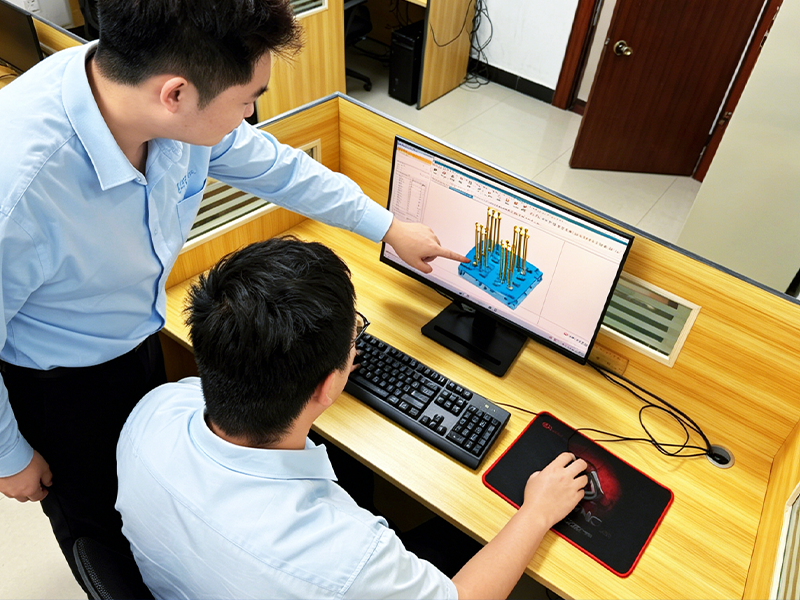
Ejector pins should not simply be positioned to push the part out. Instead, they should be distributed according to the part's structural strength and force requirements so that ejection forces act on suitable areas as evenly as possible. For thin-walled parts that are prone to deformation, particular care must be taken to avoid concentrating ejection forces in localized areas.
Identifying potential demolding problems through a mold design review before machining begins can help prevent extensive modifications after the mold has been manufactured.
Excessive packing pressure or an excessively long packing time can lead to overpacking and increase the force with which the part grips the mold core, making ejection more difficult. Therefore, packing conditions should be optimized based on the plastic material, part geometry, and gate characteristics rather than simply using higher packing pressure.
At the same time, the cooling system must ensure that the part cools as uniformly as possible. Significant temperature differences between the mold core, cavity, or different areas of the part can cause uneven shrinkage, increasing localized gripping forces and contributing to injection molding sticking problems.
A well-designed cooling channel layout, stable mold temperature control, and sufficient cooling time all help improve demolding stability.
During mold manufacturing, select appropriate machining and surface finishing processes based on the product requirements. Ensure that the core and cavity surfaces are free from noticeable machining marks, burrs, scratches, and other surface irregularities.
For high-gloss parts, polishing quality and direction must be carefully controlled. For textured parts, particular attention should be paid to texture depth and uniformity to ensure reliable mold release.
After extended production, mold surfaces may develop wear, impact damage, or localized corrosion. If these issues are not addressed promptly, they can gradually lead to demolding difficulties and increase the risk of sticking issues in injection molding.
Regular mold maintenance is therefore essential not only for maintaining part appearance but also for ensuring consistent demolding performance over long production runs.
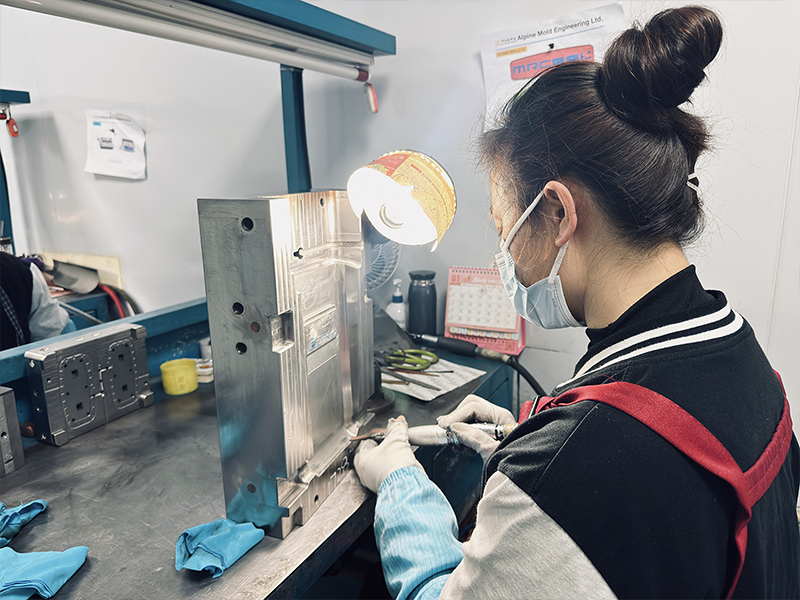
During mold trials, the focus should not be limited to whether the part can be molded successfully. The part's release and ejection behavior should also be carefully evaluated, including:
Whether the part releases smoothly from the mold core
Whether noticeable deformation occurs during ejection
Whether drag marks or scratches appear on the part surface
Whether whitening or ejector pin marks occur
Whether the part remains on the wrong side of the mold
Whether excessive ejection force is required to release the part
If minor sticking issues are detected during mold trials, the underlying causes should be investigated before mass production begins.
Troubleshooting should systematically cover draft angles, mold surface conditions, the ejection system, cooling conditions, and injection molding parameters. Simply increasing the ejection force is not an appropriate solution without identifying the root cause.
As production cycles accumulate, molds may experience wear, surface damage, restricted ejector pin movement, slider wear, and reduced cooling performance. Regular inspections and maintenance should therefore be scheduled according to production volume and actual mold condition.
For molds that have previously experienced sticking issues, it is particularly important to record the exact location of the problem, the condition of the molded part, and the production conditions at the time of occurrence. These records help determine whether the issue is an isolated incident or a recurring risk associated with the mold design or condition.
Proactive mold maintenance is generally more cost-effective than waiting until a significant number of defective parts have been produced before carrying out repairs. It also helps maintain consistent mold release performance and reduce the risk of recurring sticking issues in injection molding.
When sticking issues in injection molding occur, the first priority is to identify where and why the part is sticking rather than immediately adjusting an injection molding parameter. Without a clear troubleshooting sequence, repeatedly changing temperature, pressure, or cooling time may temporarily improve the part but fail to address the root cause.
A more effective approach is to inspect the part first, then the mold structure, and finally the molding process, moving from simple checks to more complex investigations.
First, observe where the part remains after the mold opens: on the core side, the cavity side, or around a slider or another moving mold component.
If the part is tightly gripping the mold core, focus on the draft angle, plastic shrinkage, and core surface condition. If the part is stuck around a slider or lifter, inspect the undercut geometry and the movement of the relevant mold mechanism.
Also, check whether the part shows any of the following symptoms:
Drag marks or scratches
Ejection whitening
Part deformation
Flash
Localized sticking or jamming
These symptoms can help you quickly identify the sticking location and narrow down the possible causes before proceeding with further troubleshooting.
If a mold has been running normally but suddenly develops sticking issues, first review whether any production conditions changed before the problem appeared.
For example:
Was the material or material batch changed?
Were the packing pressure or packing time adjusted?
Was the mold temperature changed?
Was the cooling time shortened?
Was the mold replaced, repaired, or modified?
Was a different injection molding machine or production setup used?
Did the part design or raw material change?
If the sticking problem started after a specific adjustment, that change becomes an important troubleshooting clue. For stable mass-production projects, identifying what changed between normal operation and the onset of the problem is often more effective than examining defective parts alone.
Once you have identified a possible cause, avoid adjusting multiple parameters simultaneously. If packing pressure is suspected to be too high, reduce it slightly and observe whether part release improves. If insufficient cooling is suspected, extend the cooling time and compare the results.
Change only one major variable at a time and record the results before and after each adjustment. This makes it easier to determine which changes improve the sticking problem and which have little effect.
If you adjust mold temperature, packing pressure, injection speed, and cooling time simultaneously, even if the part eventually releases properly, it will be difficult to determine which adjustment actually solved the problem.
When troubleshooting injection molding sticking problems, follow this simple and effective sequence:
Identify where the part is sticking → Determine what changed → Adjust one variable at a time.
This systematic approach reduces unnecessary mold trials and helps you identify the true root cause of the sticking issue.
Sticking issues in injection molding can result from insufficient draft angles, poor mold surface finish, inadequate cooling, or improper ejection design. Identifying the root cause early helps reduce mold release problems, minimize defects, and improve production stability.
Alpine Mold provides custom injection mold manufacturing and injection molding services, from mold design and trials to mass production. Contact us with your 3D drawings for a professional evaluation of your project and recommendations to prevent mold sticking.
Yes. Prolonged mold sticking may require parts to be forcibly removed, increasing wear on the ejection system, mold core, and other components. Severe sticking can also scratch mold surfaces or damage moving mechanisms. Therefore, sticking issues should be addressed promptly rather than relying on manual force to remove parts.
Mold release agents can sometimes improve part release temporarily, but they are rarely a permanent solution. If sticking is caused by part design, mold structure, or molding conditions, relying on release agents may conceal the underlying problem and affect surface quality, printing, or painting. It is better to identify the root cause first and then determine whether a release agent is necessary.
This usually indicates fluctuations in production conditions. Changes in material batches, machine conditions, ambient temperature, or actual molding parameters can affect demolding performance when the process is already operating close to its limits.
If sticking does not occur in every cycle, compare the production conditions of normal parts and defective parts. These differences often provide more useful clues than examining a single parameter in isolation.
If sticking is minor and occasional, process adjustments and further observation may be appropriate, provided there is no risk of damaging the parts or mold. However, if parts repeatedly become stuck, deform severely, or develop noticeable drag marks, large-scale production should not continue without investigation.
Continuing production can increase scrap rates and worsen mold damage. Identify and resolve the root cause before resuming mass production to avoid unnecessary costs.
Yes. Sticking problems can reduce production speed and increase labor costs, scrap rates, mold repairs, and additional mold trials. Severe cases may also cause production downtime, affecting overall manufacturing efficiency and delivery schedules.


